Painting cabinets is a skill that requires knowledge and years of experience. Not to mention the right paint products and proper preparation.
It’s important to number each cabinet door and drawer front after sanding, so you can keep track of them for reassembly later. You should also consider degreasing the surfaces as paint does not bond well to greasy spots. Contact Cabinet Painting Sacramento for professional help.
If you’re thinking about taking on a cabinet painting project, it’s important to have proper prep to ensure your paint job adheres and looks good for years. This includes properly cleaning and sanding the cabinets to remove grease, grime, and any built-up residue. It’s also a good idea to remove the hardware, like handles and hinges, and place them in a container or bag for easy reinstallation when it’s time to put everything back together. Finally, a clean and dust free work area is essential to keep from getting mud, dirt, or other contaminants on your fresh coat of paint!
Surface Prep
Start by giving the cabinets a light cleaning with a degreaser to remove any dirt or oil. This step is very important to help the new paint bond to the surface, otherwise your cabinets may start peeling and chipping over time. Once the surface is cleaned, sand it lightly with medium grit sandpaper (around 100-150 grit) and then move to a finer grit (220-320 grit). Be sure to sand in the direction of the wood grain for the best results. Once the sanding is complete, wipe down the cabinets again with a tack cloth or damp rag to get rid of any remaining dust particles.
Once the surface is wiped down and cleaned, it’s a good idea to give it a light coat of primer. This will create a surface that is smooth and ready for the final paint. Be sure to let the primer dry completely before starting on your main paint job!
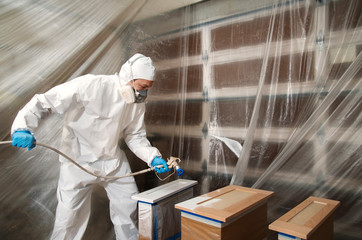
When it comes to the actual painting, most pros recommend using a brush rather than a sprayer. This will allow for more precise coverage over complex panel designs and can yield results that are closer to those of professional painters. Using a brush will also help prevent overspray and other common issues that can occur with a sprayer, especially if you’re not using proper masking techniques. A brush and good quality paint will also give you a much more durable finish than sprayed on paint.
Primer
The cabinet painting primer is the first layer that goes on your cabinets before applying paint. Its purpose is to provide a smooth base that ensures even paint application. It also acts as a barrier that protects the cabinets from moisture and contaminants that could damage them in the long run. This is especially important in kitchens, where humidity and temperature changes are common.
The primer also fills in any grains in the wood, providing a more even surface for painting. It can help eliminate the need for many coats of paint, which reduces overall labor costs and time. It is available in a variety of different formulations to suit the cabinet material. It can be oil-based, water-based or shellac-based, depending on the type of surface you’re painting. Oil-based and shellac-based primers require a longer drying time and emit stronger odors than their water-based counterparts. If you’re sensitive to strong odors, you may want to choose a water-based primer.
If you’re changing the color of your cabinets, primer is essential to get a thorough coverage without any bleed-through from the old hue. It helps the new paint bond with the surface and locks in stains to prevent future moisture damage.
Loose or chipping paint is an indicator that the primer was not applied properly. A good quality cabinet primer is vital to ensuring that the paint job adheres and stays put for a long time.
It is a good idea to purchase your Cabinets primer separately from the paint, since most do-it-yourselfers prefer to use self-priming paint as a one-stop solution for their project. However, the extra cost of a separate primer will make it worth it in terms of extending the life of your kitchen cabinets.
Moisture seeps into unprotected wood and causes it to swell or warp. Primer creates a seal over the wood to prevent this from occurring, which will ultimately extend the life of your cabinets and save you money in the long run by reducing the need for premature repairs or replacements. A well-chosen primer will also increase the durability of your cabinet paint, preventing cracking and peeling over time, even in high-traffic areas like kitchens.
Paint
Cabinet painting is a quick and cost-effective way to make over a kitchen or bathroom. It’s also a great alternative to replacing or refacing cabinets. If done correctly, painted cabinets will stand the test of time and look like new. However, many DIYers do not have the proper training and equipment to successfully paint their cabinets. In the worst case, they may end up with a paint job that looks bad and will not hold up to everyday use.
One of the biggest mistakes that people make when they are painting their own cabinets is applying the paint without properly cleaning the surface. Wood surfaces are very porous and require a light sanding and Cabinets primer before the paint will adhere. This helps to ensure that the new color sticks and doesn’t chip or peel.
It’s important to use a high quality latex or oil-based paint that is formulated for cabinetry. This type of paint will provide a durable finish that can withstand moisture, humidity, and sunlight. It is also essential to use proper masking techniques to protect adjacent surfaces from overspray during the application process. For best results, it is recommended that you hand-paint your cabinets instead of using a sprayer. This will allow you to have better control over the application of the paint, resulting in a professional-looking finish.
Depending on the size of your cabinetry, you may need to apply multiple coats of paint and allow each to dry completely between applications. This will add a day or two to your project timeline. It is also important to remove the cabinet doors from the hinges before starting to minimize the chance of smudges and drips. It is important to label where each door goes before removing it so you know where to reinstall it when the project is completed.
Finally, it’s a good idea to cover the floor and countertops with drop cloths or painters tape to prevent dust and spills from getting on them. You should also place pads on the feet of any furniture that will be sitting in front of your cabinetry, so they don’t scratch or damage the freshly-painted surface.
Finish
When choosing a paint finish for your cabinets, you have several options available to you. The finish you choose will affect how your cabinet doors and drawers look when they are open. High-gloss finishes, for example, tend to show every fingerprint and smudge, but they also reflect light well. Semi-gloss and satin finishes offer an attractive sheen that hides imperfections well. They are durable and easy to clean, making them a good choice for busy kitchens.
If you want your new cabinet finish to last and look professional, then you’ll need to use a topcoat. This coat seals the paint and helps it resist moisture. It’s important to let the final coat dry fully before you begin using your cabinets again. Typically, it takes about two weeks for painted cabinetry to cure and reach its full durability. If you skip this step, your new cabinet finish could easily chip or peel.
A professional-grade oil-based enamel is an excellent choice for painting cabinets. It provides superior coverage and durability compared to latex paints. It also has better adhesion properties that prevent chipping or peeling over time. However, oil-based enamels require more extensive surface preparation and have longer drying times than latex options.
Water-based latex paints are another popular choice for cabinet painting. They are easier to apply than oil-based products and dry much quicker. They also have lower VOCs (volatile organic compounds) and are safer for indoor air quality.
Many homeowners turn to DIY cabinet painting to save money and improve the look of their homes. However, DIY projects can be difficult if you don’t have the right skills or experience. Cabinet painting requires a lot of careful prep work, including stripping and sanding the old surface down to the bare wood. This is a process that should be left to professionals who have the proper training, tools, and equipment to do it properly.
The best way to protect your investment is to hire a professional for your cabinet painting project. They have the knowledge and expertise to ensure your finished project looks great and lasts for years to come. Those Pinterest photos that make cabinet painting seem like an easy DIY project don’t often include 2-year follow-ups, so it’s important to hire a pro if you want your finished project to be the envy of your neighborhood.